1. 레이아웃 구현하기
레이아웃은 실제로 방통대에서 오프라인으로 태플릿 시험을 볼 때 화면과 가장 유사하게 만들려고 노력했다. 반응형보다는 높이, 넓이가 고정되어 있고 웹에서 최적화가 되도록 했다.
처음에 Div를 여러개 만들어 해보려고 했으나 생각보다 잘되지 않아서 그냥 테이블 태그를 이용해서 만들었다.
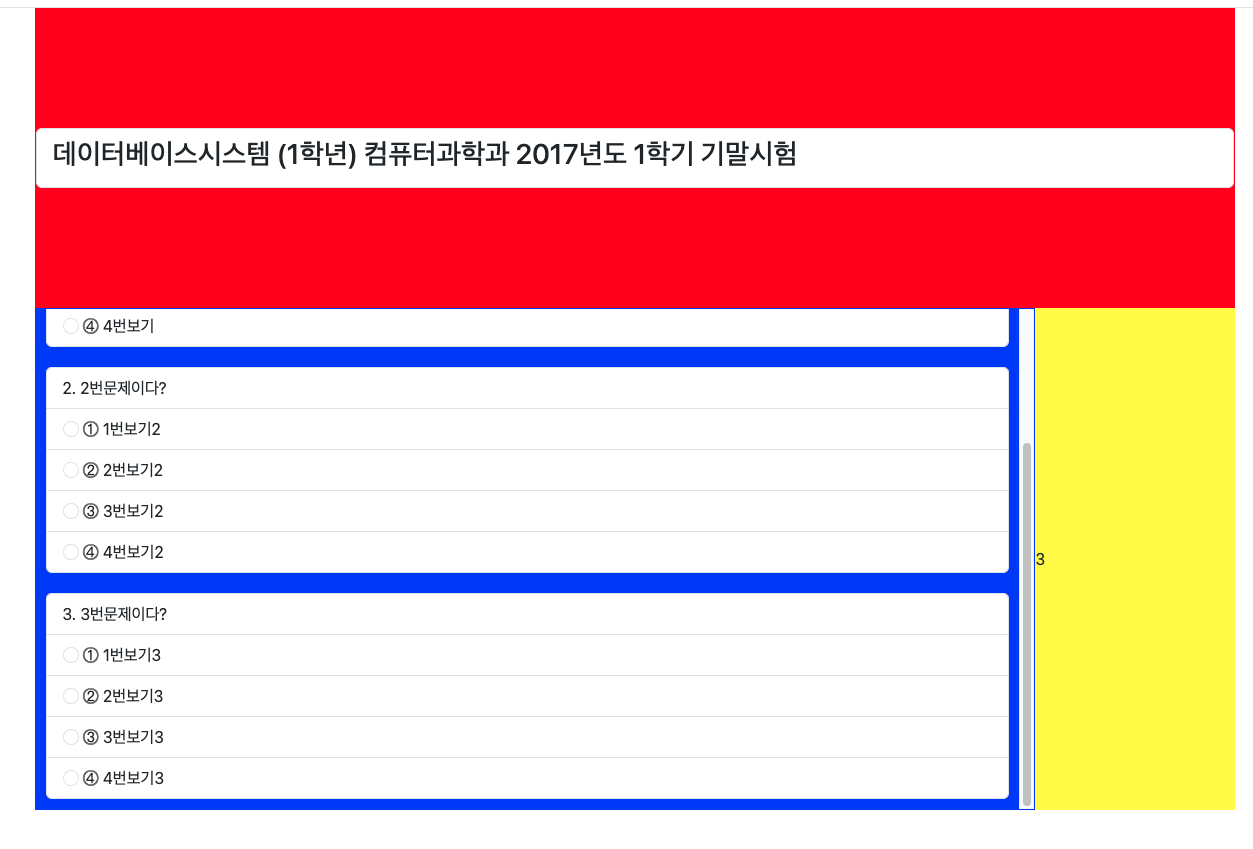
이런식으로 테이블태그를 만들고 각각의 배경색을 눈에 띄는 원색으로 입혀서 테이블 모양이 어떤지 확인하면서 작업했음.
고생 끝에 완성된 레이아웃은 이런 형태이다. 별로 예쁘진 않지만........
일단 가로세로 높이가 픽스되어서 고정형이고 안에 문제가 나오는 부분도 고정형으로 내부 스크롤이 따로 있으며,
좌측에는 문제와 보기가 보여지고 우측에는 어떤 답을 선택했는지 OMR형식으로 보여주는 화면으로 구성되어있다.
2. 문제와 보기 조회하기

현재 문제와 보기를 담고 있는 테이블은 이런 구조로 되어있다. 모든 문제가 혹은 앞으로 모든문제가 4지선다일것이라는 강력한 믿음 ㅋㅋㅋㅋㅋㅋㅋㅋㅋㅋㅋㅋㅋㅋㅋㅋ
ExamDetail.java
@Getter @Setter @RequiredArgsConstructor
public class ExamDetail {

    private String examId;
    private String departmentName;
    private String subjectId;
    private String subjectName;
    private int examYear;
    private int grade;
    private int semester;
    private int examCategory;
    private int questionNo;
    private String question;
    private String choice1;
    private String choice2;
    private String choice3;
    private String choice4;
    private int answer;
    private String useYn;

}
이 모든 것들을 담아줄 객체를 하나 따로 생성했다.
ExamService.java
package knou.cbt.domain.exam;


import java.util.List;

public interface ExamService {
    List<ExamDetail> findByExamId(String examId);
}
하나의 시험이지만 단건이 아니라 여러 문제와 보기를 조회하는 것이라 리스트로 반환하였다.
ExamServiceImpl.java
package knou.cbt.domain.exam;

import lombok.RequiredArgsConstructor;
import org.springframework.stereotype.Service;

import java.util.List;

@Service
@RequiredArgsConstructor
public class ExamServiceImpl implements ExamService{

    private final ExamMapper examMapper;

    @Override
    public List<ExamDetail> findByExamId(String examId) {
        return examMapper.findByExamId(examId);
    }

}
ExamMapper.xml
package knou.cbt.domain.exam;

import org.apache.ibatis.annotations.Mapper;
import org.apache.ibatis.annotations.Param;

import java.util.List;

@Mapper
public interface ExamMapper {

    List<ExamDetail> findByExamId(@Param("examId") String examId);

}
ExamMapper.xml
<?xml version="1.0" encoding="UTF-8" ?>
<!DOCTYPE mapper PUBLIC "-//mybatis.org//DTD Mapper 3.0//EN"
        "http://mybatis.org/dtd/mybatis-3-mapper.dtd">

<mapper namespace="knou.cbt.domain.exam.ExamMapper">

    <select id="findByExamId" parameterType="java.lang.String"
            resultType="knou.cbt.domain.exam.ExamDetail">
        SELECT    E.EXAM_ID
             , (SELECT DEPARTMENT_NAME
                FROM DEPARTMENT
                WHERE department_id = SUBSTR(E.SUBJECT_ID, 1, 1) ) AS DEPARTMENT_NAME
             , E.SUBJECT_ID
             , ( SELECT SUBJECT_NAME
                 FROM SUBJECT
                 WHERE SUBJECT_ID = E.SUBJECT_ID ) AS SUBJECT_NAME
             , E.EXAM_YEAR
             , E.GRADE
             , E.SEMESTER
             , E.EXAM_CATEGORY
             , EQ.QUESTION_NO
             , EQ.QUESTION
             , EQ.CHOICE_1
             , EQ.CHOICE_2
             , EQ.CHOICE_3
             , EQ.CHOICE_4
             , EQ.ANSWER
        FROM EXAM E LEFT OUTER JOIN EXAM_QUESTIONS EQ
        ON E.EXAM_ID = EQ.EXAM_ID
        WHERE E.USE_YN = 'Y'
          AND EQ.USE_YN = 'Y'
          AND E.EXAM_ID  = #{examId}
        ORDER BY QUESTION_NO;
    </select>


</mapper>
Outer join이 필수였는데 Mysql에서는 아우터조인 방법이 좀 다른 부분이 있어서 한참 걸렸지만...어쨌든 극복.
ExamController.java
package knou.cbt.web.exam;

import jakarta.servlet.http.HttpServletRequest;
import knou.cbt.domain.department.DepartmentServiceImpl;
import knou.cbt.domain.exam.*;
import lombok.RequiredArgsConstructor;
import org.springframework.http.ResponseEntity;
import org.springframework.stereotype.Controller;
import org.springframework.ui.Model;
import org.springframework.web.bind.annotation.*;

import java.awt.print.Book;
import java.util.HashMap;
import java.util.List;
import java.util.Map;
import java.util.Objects;

@Controller
@RequiredArgsConstructor
@RequestMapping("/exam")
public class ExamController {

    private final ExamServiceImpl examService;

    @GetMapping("/{examId}")
    public String book(@PathVariable String examId, Model model){
        List<ExamDetail> examQuestions = examService.findByExamId(examId);
        model.addAttribute("examQuestions", examQuestions);
        return "exam/exam";
    }


}
컨트롤러가 생각보다 엄청 엄청 간단하다.
Exam.html
<!DOCTYPE html>
<html lang="ko"
xmlns:th="http://www.thymeleaf.org"
xmlns:layout="http://www.ultraq.net.nz/thymeleaf/layout">
<head>
<meta charset="UTF-8">
<link href="/css/bootstrap.min.css" rel="stylesheet">
<title>기출문제</title>
<script th:src="@{/js/exam.js}"></script>
<script>
</script>
</head>
<body style="background-color: #75b798">
<div class="container" id="content">
<table style="width: 1200px; margin-top: 100px; background-color: white;">
<tr>
<td colspan="2" style="height: 200px; padding: 10px;">
<!-- 버튼 -->
<div style="text-align: right; margin-bottom: 5px;">
<button type="button" class="btn btn-primary btn-lg" th:onclick="|location.href='@{/exam}'|">돌아가기</button>
<button type="button" class="btn btn-danger btn-lg" id="finishBtn">시험종료</button>
</div>
<!-- header -->
<ul class="list-group" id="header">
<li class="list-group-item" style="border: 0px;">
<h3 th:if="${examQuestions[0].examCategory== 1}"
th:text="|${examQuestions[0].subjectName}
(${examQuestions[0].grade}학년) ${examQuestions[0].departmentName}
${examQuestions[0].examYear}년도 ${examQuestions[0].semester}학기 기말시험|"></h3>
<h3 th:if="${examQuestions[0].examCategory== 2}"
th:text="|${examQuestions[0].subjectName}
(${examQuestions[0].grade}학년) ${examQuestions[0].departmentName}
${examQuestions[0].examYear}년도 ${examQuestions[0].semester}학기 계절학기(동계)|"></h3>
<h3 th:if="${examQuestions[0].examCategory== 3}"
th:text="|${examQuestions[0].subjectName}
(${examQuestions[0].grade}학년) ${examQuestions[0].departmentName}
${examQuestions[0].examYear}년도 ${examQuestions[0].semester}학기 계절학기(하계)|"></h3>
</li>
<li class="list-group-item" style="text-align: right; border: 0px;">
<span>소요시간 : </span>
<span id="loadTime" style="color: red;">Time...</span>
</li>
<li class="list-group-item" id="remainingQuestions" style="text-align: right; border: 0px;">
</li>
</ul>
</td>
</tr>
<tr>
<td rowspan="2" style="width: 1000px; height: 600px;">
<!-- 문제 -->
<div style="height: 600px; overflow: auto;">
<ul class="list-group" th:each="examQuestion : ${examQuestions}" style="padding: 10px;">
<li class="list-group-item" th:text="|${examQuestion.questionNo}. ${examQuestion.question}|">문제번호. 문제</li>
<li class="list-group-item">
<input class="form-check-input" type="radio" th:name="|choice_${examQuestion.questionNo}|" th:id="|choice_${examQuestion.questionNo}_1|">
<label class="form-check-label" th:for="|choice_${examQuestion.questionNo}_1|">⓵ [[${examQuestion.choice1}]]</label>
</li>
<li class="list-group-item">
<input class="form-check-input" type="radio" th:name="|choice_${examQuestion.questionNo}|" th:id="|choice_${examQuestion.questionNo}_2|">
<label class="form-check-label" th:for="|choice_${examQuestion.questionNo}_2|">⓶ [[${examQuestion.choice2}]]</label>
</li>
<li class="list-group-item">
<input class="form-check-input" type="radio" th:name="|choice_${examQuestion.questionNo}|" th:id="|choice_${examQuestion.questionNo}_3|">
<label class="form-check-label" th:for="|choice_${examQuestion.questionNo}_3|">⓷ [[${examQuestion.choice3}]]</label>
</li>
<li class="list-group-item">
<input class="form-check-input" type="radio" th:name="|choice_${examQuestion.questionNo}|" th:id="|choice_${examQuestion.questionNo}_4|">
<label class="form-check-label" th:for="|choice_${examQuestion.questionNo}_4|">⓸ [[${examQuestion.choice4}]]</label>
</li>
</ul>
</div>
</td>
<td style="width: 200px; height: 600px; ">
<div id="sideChoice" style=" height: 600px; overflow: auto; font-size: 30px;">
</div>
</td>
</tr>
</table>
</div>
</body>
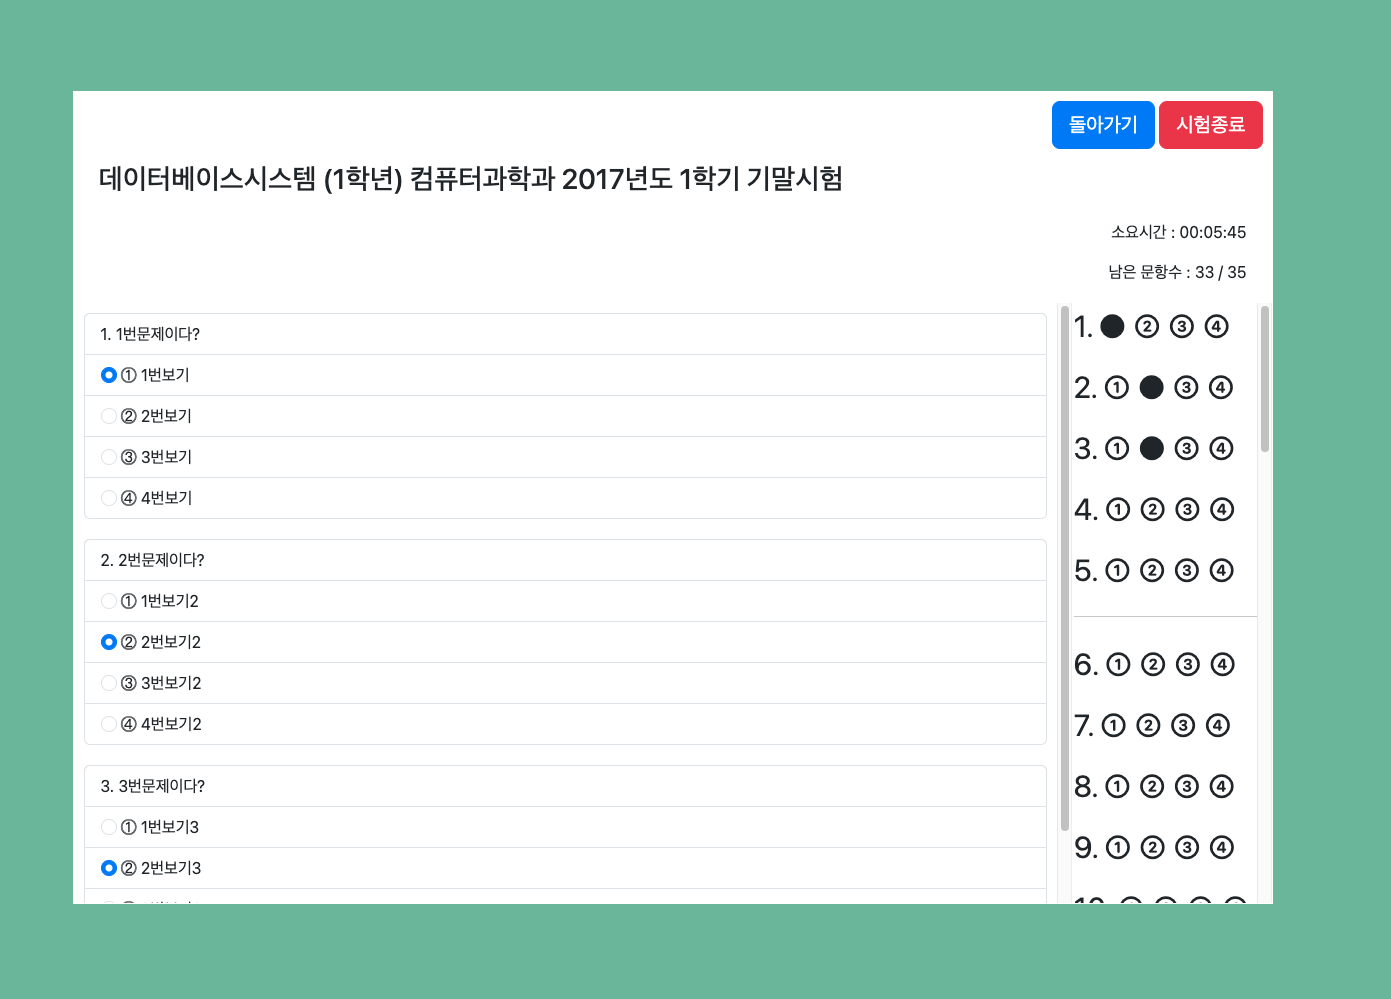
</html>복잡해 보이지만 시험 목록 조회하는 것처럼 열심히 For문 돌려주면 된다.
[구현화면]
짜잔 (사실 아까 이미지 복붙) 이렇게 해서 문제와 보기를 출력했다!
3. 소요시간 출력하기
화면이 열리자마자 소요시간을 측정해서 결과 테이블에 저장할 예정이다. 일단 초시간을 측정하려면?
window.onload = function() {
    const timer = setInterval(() => {
        const currentTime = new Date().getTime();
        const elapsedTime = currentTime - startTime;

        const hours = Math.floor(elapsedTime / (1000 * 60 * 60));
        const minutes = Math.floor((elapsedTime % (1000 * 60 * 60)) / (1000 * 60));
        const seconds = Math.floor((elapsedTime % (1000 * 60)) / 1000);

        const timeElement = document.getElementById('loadTime');
        timeElement.textContent = `${hours < 10 ? '0' + hours : hours}:${minutes < 10 ? '0' + minutes : minutes}:${seconds < 10 ? '0' + seconds : seconds}`;
    }, 1000);

    const startTime = new Date().getTime();
};
위와 같은 내용으로 구현 완. 한마디로 지금 시간을 구해서 인터벌 함수를 사용하여 1초마다 갱신해서 보여주는 방식으로 구현했다.
[구현화면]
4. 라디오버튼 클릭 -> 우측에 OMR 색칠! / 우측에 OMR 선택 -> 라디오버튼 자동선택!
라디오버튼의 클릭과 OMR이 동기화 되는건데 설명이 어려워서 기능을 설명할 움짤 첨부!

exam.js
function createSpanNumber() {

    for (let i = 1; i <= 35; i++) {
        const number = document.createElement("p");
        number.innerText = `${i}. `;

        const span = document.createElement("span");
        span.innerText = `① `;
        span.id = `choice_${i}_1`;
        number.appendChild(span);

        const span2 = document.createElement("span");
        span2.innerText = `② `;
        span2.id = `choice_${i}_2`;
        number.appendChild(span2);

        const span3 = document.createElement("span");
        span3.innerText = `③ `;
        span3.id = `choice_${i}_3`;
        number.appendChild(span3);

        const span4 = document.createElement("span");
        span4.innerText = `④`;
        span4.id = `choice_${i}_4`;
        number.appendChild(span4);

        document.getElementById("sideChoice").appendChild(number);
        if (i % 5 === 0){
            const hr = document.createElement("hr");
            hr.className = 'my-4';
            document.getElementById("sideChoice").appendChild(hr);
        }
    }
}
먼저 우측의 OMR을 하드코딩하지 않고 자바스크립트로 for문 돌려서 만들어줬다.
document.addEventListener('DOMContentLoaded', function() {

    updateRemainingQuestions();
    createSpanNumber();

    const spans = document.querySelectorAll('span[id*="choice"]');
    const radios = document.querySelectorAll("input[type=radio]");

    radios.forEach(radio => {
        radio.addEventListener('change', function() {
            debugger;
            updateRemainingQuestions();
            const radio = document.getElementById(this.id);
            const selectSpan = document.querySelector('span[id="'+ radio.id +'"]');
            const spanId = this.id;
            updateSpan('radio', radio, selectSpan, spanId);
        });
    });

    spans.forEach((span, index) => {
        span.addEventListener("click", () => {
            debugger;
            updateRemainingQuestions();
            const radio = document.getElementById(span.id);
            const selectSpan = document.querySelector('span[id="'+ span.id +'"]');
            const spanId = span.id;
            updateSpan('span', radio, selectSpan, spanId);
        });
    });
    document.getElementById("finishBtn").addEventListener("click", function() {
        finishBtn(radios);
    });
});
function updateSpan( category, radio, selectSpan, spanId) {
selectSpan.innerText ='● ';
if (category === 'span'){
radio.checked = true;
}
let arr = spanId.split("_");
for (let i = 1; i <= 4; i++){
if (i !== Number(spanId.substring(spanId.length - 1))){
let leftSpan = document.querySelector('span[id="choice_'+ arr[1] +'_' + i +'"]');
if (i === 1)leftSpan.innerText = '① ';
if (i === 2)leftSpan.innerText = '② ';
if (i === 3)leftSpan.innerText = '③ ';
if (i === 4)leftSpan.innerText = '④';
}
}
}최대한 OMR과 라디오버튼의 아이디나 네임값을 같게해서 최대한 길게 코딩하지 않도록 노력했다.
5. 남은 문항수 보여주기
문제를 풀면 남은 문항수에서 제외되고 내가 몇문제를 풀었고 몇문제를 풀지 않았는지 확인할 수 있는 부분!
Exam.js
function updateRemainingQuestions() {
    // 총 문제 수 설정
    const totalQuestions = 35;
    const remainingQuestionsElement = document.getElementById("remainingQuestions");
    const radioButtons = document.querySelectorAll("input[type=radio]");

    const answeredQuestions = new Set();
    radioButtons.forEach(button => {
        if (button.checked) {
            const questionName = button.name;
            answeredQuestions.add(questionName);
        }
    });
    const remainingQuestions = totalQuestions - answeredQuestions.size;
    remainingQuestionsElement.textContent = `남은 문항수 : ${remainingQuestions} / ${totalQuestions}`;
}
체크된 문항을 Set에 넣은 후 전체 문항수에서 빼는 비교적 간단한 방법으로 구현했다.
[구현화면]
6. 문제 제출시, 안푼문제가 있다면 포커스 이동
문제를 다 풀고 문제 제출시에 안푼문제로 이동할 수 있는 기능을 제공함.
exam.js
function finishBtn(radios){
    let result = confirm("시험을 종료하시겠습니까?");
    if (result) {
        let arr = [];
        for (let i = 1; i <= 3; i++){
            if (!document.querySelector('[name="choice_' + i +'"]').checked){
                arr.push("choice_" + i);
            }
        }
        if (arr.length !== 0) {
            let result = confirm("풀지 않은 문제가 있습니다. 풀지 않은 문제로 이동하시겠습니까?");
            if (result) {
                document.querySelectorAll('[name="'+ arr[0]+'"]')[0].focus();
                document.querySelectorAll('[name="'+ arr[0]+'"]')[0].scrollIntoView({ behavior: 'smooth', block: 'center' });
            } else{
                alert("시험이 종료되었습니다. 수고하셨습니다.");
            }
        } else {
            alert("시험이 종료되었습니다. 수고하셨습니다.");
        }
    }

}
[구현화면]
'💻 뚝딱뚝딱 > 방통대CBT' 카테고리의 다른 글
| [개발일지#004] 기출문제 목록조회 (검색조회 및 페이지네이션 포함) (0) | 2024.06.18 |
|---|---|
| [개발일지#003] 기본 부트스트랩 적용 / 기출문제 전체조회 구현 (0) | 2024.06.07 |
| [개발일지#002] 스프링 프로젝트 생성 및 Mybatis 연결 (0) | 2024.06.07 |
| [개발일지#001] 데이터베이스 설계 및 생성 (0) | 2024.06.06 |
| [개발일지#000] 방통대CBT 제작계기 & 사용기술스택 & 요구사항 (0) | 2024.06.05 |


